Solomon Recipes

I started this blog so I could pass along family recipes to my children. Most of these recipes are Eaton recipes.


But, no need to share the last name Solomon. The majority of the recipes are made by me, Mother Goose, my Sister in law, Gretchen and two friends Leta and HK. If you would like to be a contributor, just holla!


PICTURES ON THIS BLOG ARE NOT TO BE TAKEN

You can contact me at 1flyinhawaiian@twc.com


Please check my family blog out with a clickety click.


Shhh... if you know us please get to know our blog names! Thanks, Mother Goose!


Monday, March 28, 2011

Whoopie Pies made from a boxed cake mix!

Photobucket
Photobucket
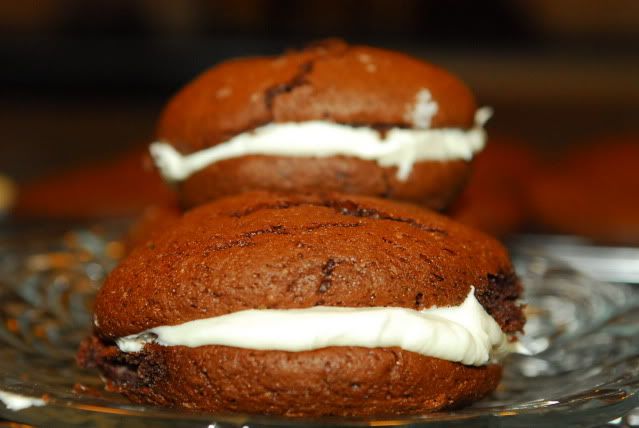
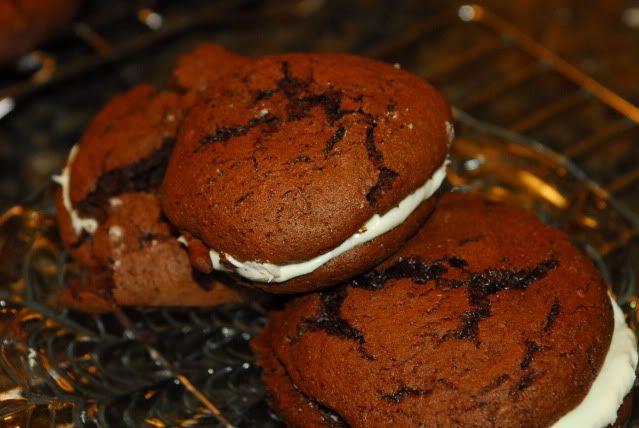
GOOD heavens these babies are amazing! And what makes them extra special is they are from a cake mix! I am really enjoying taking short cuts! I took the recipe straight from Group Recipes. I will definitely be making pumpkin flavored pies and red velvet pies.

It takes 10 minutes to create this loveliness and serves approximately 16 people. My second favorite about this recipe is you can choose any flavor cake mix your heart desires : red velvet, pumpkin, strawberry, lemon etc! OOHh, the options are endless.  I am going to be making a sugardoodle cake! It would be heaven to make sugardoodle pies! YUM YUM YUM!

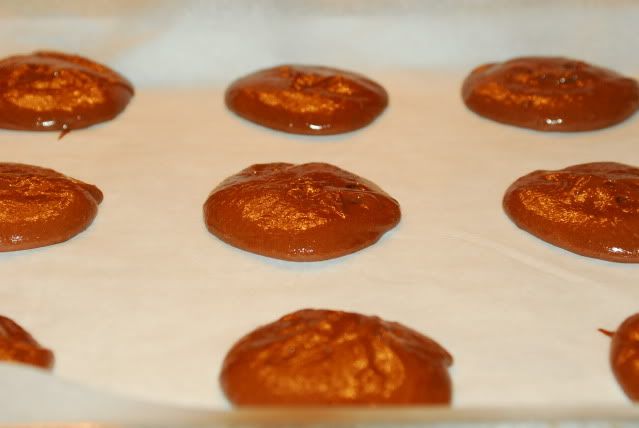
Remember I took this recipe straight from Group Recipes and did no adapting. Just copied it and created it and it is true to its directions. ***The only thing I did differently was I only used 1TBL spoon mound of batter for my pie rounds. They were a bit large.  The next time I create this I will try 1/2 a table spoon and see if that will lend to the perfect size finger food that I am looking for!***
This was 1TBLsp. prior to baking. I would have liked my pies to be this diameter as a finished product.
Photobucket
 PIES
  • 1 boxed cake mix (I've made this with different cake mixes...chocolate, lemon, spice, Strawberry and my favorite, Red Velvet)
  • 3eggs
  • 1/2 cup water
  • 1/2 cup oil
 Filling

How to make it

  • Preheat oven to 400
  • Line cookie sheet with parchment paper
  • In mixing bowl beat all ingredients on medium low speed until well combined
  • Drop by 2 tablespoonfuls onto cookie sheets, 2 inches apart
  • Bake 8-10 minutes, until puffed and toothpick inserted in center comes out clean
  • Cool on rack until completely cool
  • In mixing bowl, add butter, marshmallow, powdered sugar, cream cheese, vanilla, and salt
  • Beat until smooth
  • Put 1/2 of pies, flat side up, on a cool baking sheet
  • Mound about 1 1/2 tbls. filling in the center of each
  • Top with remaining pies, rounded side up, and press gently so filling spreads Keep chilled until ready to serve
    Photobucket

Monday, March 14, 2011

Italian Baked Pork Chops


YUM YUM IN MY TUMMY TUM TUM! We haven't had pork chops in a very long time! I think swine is definitely the under appreciated other white meat! I mean... I'm just saying!

My trick to ensuring that pork chops are always tender and moist is to boil them completely covered in water in a skillet. I will cook them almost completely done where there is showing just the slightest shade of blush or pale pink! (Think Steele Magnolias, if you are too young to know that movie. I can't only say, Sorry)

I then remove the skillet from the stove and drain the water and take rinse the pork chops. The following recipe is for 8 servings.

2 TBL. spoons dijon mustard
2 TBL spoons olive oil
1/2 tsp Italian Seasoning
1/2 cup Italian Bread crumbs
Salt and pepper
1/2 cup shredded parmesan cheese
Please add more oil or mustard to form a crust like consistency when applying to chops! This recipe was created on whim and I added things as I went. When you get into it, you will be able to see and adjust to what looks right to you.

Preheat oven to 400 degress and line baking sheet with parchment paper.
In a small bowl whisk all ingredients together. Apply to both sides of the pork chops and place on parchment paper.
Bake 10 minutes or until just cooked through. It will form a slight crust texture. If you wish you could flip the pork chops over and cook again until just crusted or at this point, they are ready to be removed from oven. Let rest 5 minutes.

I served this with mixed vegetables and mashed potatoes!

Fruit Pizza

I just love fruit and fresh fruit is always a tell tale sign to me that spring and good things are just around the corner! I keep thinking if I load my fridge with fresh veggies and fruits that it will bring out the warm weather! So far, it hasn't worked.

Nothing like a refreshing dessert. Fruit pizza has a sweet tender dough. A sugar cookie dough, topped with a smoothe cream cheese tart frosting and the brightness of any fruit you so desire to top. You can bake this on a pizza round or in a 9x13 pan. I also prefer to have my dough a bit on the thicker side, 'cuz you know; that's how I roll but please feel free to make it anyway your little heart desires.


This dessert was made for our March Birthday celebration and it is always a crowd pleaser. Ann Trujillo made this dessert! Gotta love it!

The recipe is from Allrecipes. And also adapted from two peas and their pod

FRUIT PIZZA

Ingredients
1/2 cup butter, softened
3/4 cup white sugar
1 egg
1 tsp. vanilla
Zest of 1 lemon
1 1/4 cups all-purpose flour
1 teaspoon cream of tartar
1/2 tsp. baking soda
1/4 tsp. salt

Frosting:
1 package cream cheese, softened (8 oz.)
2 T sugar
1/2 cup powdered sugar
1 tsp. vanilla
1 T. fresh lemon juice
Zest of 1 lemon

Fruit:Strawberries
Blueberries
Peaches
Kiwi

CRUST

1. Preheat oven to 350 degrees F. Spray a pizza pan with cooking spray or a 9x13 pan. Set aside.
2. In a large bowl, cream together the butter and 2/3 cup sugar until smooth.
3. Mix in egg, vanilla, and lemon zest.
4. Combine the flour, cream of tartar, baking soda and salt;
5. Stir into the creamed mixture until just blended.
6. Press dough into pizza pan.
7. Bake in preheated oven for 10-12 minutes, or until lightly browned. Cool.
8. In a large bowl, beat cream cheese, sugars, vanilla, lemon juice, and lemon zest.
9. Spread on the cooled pizza crust.
10. Arrange fruit on top of the pizza. Chill until serving time.

Sunday, March 13, 2011

Panera Bread Broccoli Cheddar Soup

I went to a luncheon and brought this heart warming soup! It was thick, rich and delicious! I doubled the recipe and it served 8 people perfectly, when doubled. The original recipe can be found here.
The perfect presentation would have been to serve it into bread bowls! But, I was being cost efficient and didn't find it necessary to spend $4 on a bread bowl when we had homemade rolls there as well! It was very good and I would definitely make it again!

Recipe Serves 4
Ingredients
1 tablespoon butter, melted ( I added more
1/2 medium onion, chopped (Instead, I replaced with  minced onion powder) My husband doesn't like the texture of onions.
1/4 cup melted butter
1/4 cup flour
2 cups half-and-half ( I added more, it will depend how thin or thick you like your soup)
2 cups chicken stock or bouillon
1/2 pound fresh broccoli
1 cup carrots, julienned (this time I omitted the carrots)
salt and pepper to taste
1/4 teaspoon nutmeg
8 ounces grated sharp cheddar (Again, I added more, all of these things are to taste.)

I also added a bit of garlic powder to taste. I would start with 1/4 tsp.
Directions


Saute onion in butter. Set aside. Cook melted butter and flour using a whisk over medium heat for 3-5 minutes. Stir constantly and slowly add the half-and-half (this is called making a roux). Add the chicken stock whisking all the time. Simmer for 20 minutes.

Add the broccoli, carrots and onions. Cook over low heat until the veggies are tender for 20-25 minutes. Add salt and pepper. The soup should be thickened by now. Pour in batches into blender and puree. Return to pot over low heat and add the grated cheese; stir until well blended. Stir in the nutmeg and serve.  Garnish with fresh steamed broccoli and sprinkle with cheese. Serve with crusty roll or in a bread bowl.

Saturday, March 12, 2011

Ann Trujillo's Cranberry Cake

What can I say? I have good friends who have good taste buds! Ann also likes recipes from Taste of Home and she recently brought this tart but sweet little number to a luncheon that we had! Holy Deliciousness!

This cake, is more like a bread! It is moist, it has craters of air pockets which lends it to be very airy and light! The cranberries make this not too sweet and just the perfect blend of goodness. It is the perfect treat to bring to a brunch or luncheon!

If you find that you need a little extra yumm to the dish, please add a dollup of fresh whipped topping and then sit back and swoon!

The original Recipe and credit goes to. Marilyn Paradis from Woodburn, Oregon.
Taste of Home
Yields- 15/20 servings
Prep time 15 min. Bake time 45 min

Ingredients

3 eggs
2 cups sugar
3/4 cup butter, softened
1 teaspoon almond extract
2 cups all-purpose flour
2-1/2 cups fresh or frozen cranberries, thawed
2/3 cup chopped pecans
Whipped cream, optional

DirectionsIn a large bowl, beat eggs and sugar until slightly thickened and lemon-colored, about 5 minutes.
Add butter and extract; beat 2 minutes.
Gradually stir in flour just until combined.
Stir in cranberries and pecans. Spread in a greased 13-in. x 9-in. baking dish.

Bake at 350° for 45-50 minutes or until a toothpick inserted near the center comes out clean. Serve with whipped cream if desired. Yield: 16-20 servings.

Nutrition Facts: 1 serving (1 piece) equals 229 calories, 11 g fat (5 g saturated fat), 50 mg cholesterol, 79 mg sodium, 32 g carbohydrate, 1 g fiber, 3 g protein.

Cranberry Cake published in Taste of Home October/November 1996, p37

Friday, March 11, 2011

Home made Steak Tacos

Yadira has come to spend her Spring break with us and she has spoiled me from ever reaching for a pre made taco again!! I'm so sad! These are delicious and I wondered why I didn't just fry up my own tacos!
The pico de gallo is delicious! I'm eating it with everything.
Steak Tacos served with pico de gallo, spanish rice and refried beans!
Serves 4 to 6
Ingredients
1 1/2 lb flank steak, trimmed (We had left over steak from the night before)
1 tablespoon ground cumin
1 and 1/2 tablespoon chile powder
3/4 teaspoon black pepper
1 teaspoon cayenne
1 1/2 teaspoons salt
1 package of corn tortillas
Can you just taste the goodness?

DIRECTIONS
  1. Heat a well-seasoned ridged grill pan (preferably cast-iron) over moderately high heat until beginning to smoke, then brush with oil.
  2. While pan heats, pat steak dry and stir together spices and salt, then rub all over both sides of steak.
  3. Grill steak, turning over once, 9 to 11 minutes total for medium-rare. Transfer to a cutting board and let stand 10 minutes.
  4. Because my steak was left over, it is NY Strip and ribeye and I sliced it thin and small to stretch it to feed all of us.
  5. Cut steak thinly steak across the grain. Serve with tortillas and toppings. Because my steak was a left over. I made up the seasoning and quickly heated the meat with it for flavor!
MAKING THE TORTILLAS
Prior to frying the corn tortillas. Place a few tortillas on a microwave safe dish and place a damp paper towel over the top. Heat for 20 seconds or so. We just want these soft and pliable so they do not crack when folded.

Once tortilla is heated add a table spoon or two of the meat to the center of the tortilla. You don't want to over stuff with meat because the tortilla should fold over easily, while in the pan.

 You will want to use a fork to keep the top from unfolding. You may place more than one in the frying pan. You want to the oil to sizzle but not reach it's smoking point.

REMOVE from pan and place on paper towel to remove excess oil. Continue frying the remainder of the tortillas until all the meat is used.
The only down side to this is if you are not careful with heating the oil it can leave your house with a fried oil smell. But, it is definitely worth the satisfaction of preparing!

Home made Pico De Gallo

Where have I been? Why have I never made my own Pico De Gallo! This is wonderful and fresh and beautiful! Everything is right in the world because I now make my very own! The Mr. does not like onions at all! He loves the flavor but not the texture. So, I pulled some aside and made some without onions. He was a happy man!

Ingredients
5 to 6 roma tomatos (diced)
1 medium onion (diced very fine)
1 bunch of cilantro (chopped)
3 limes (squeezed)
You may also add jalapenos
Please click here to learn how to pick and choose the perfect lime.

Directions: Dice and chop all ingredients and then add to a medium size bowl and squeeze with lime juice. Refrigerate for 30 minutes. Serve with anything.
Yadira dicing the tomatos
MK chopping the onions, not one tear
The amount of cilantro we used
The two seperate bowls. One for the Mr. minus the onions
Squeezing the juice of 3 limes
Perfection!

How to choose the perfect lime

A lime is definitey one of the power houses to bring out the flavor of food! It can really brighten up your dish! Limes are in their peak season from May thru August! It is the perfect time to make many dishes and drinks. Limeades being amongst my favorite! Limes are an excellent source of vitamin C, Vitamin C is one of the main antioxidants found in food and the primary water-soluble antioxidant in the body.

So here is the quick and easy way on how I choose a lime. Please choose a lime that has no brown spots and is a rich dark green in color. You will want to look at the lime and make sure that the majority of the lime is glossy and smooth and not pitted. There will be some pit marks and texture near the ends but on the majority you want your lime to be smooth and a rich color.

Choose limes that are firm and heavy for their size, free of decay and mold. They should have a glossy skin that is deep green in color; although limes turn more yellow as they ripen, they are at the height of their lively, tart flavor when they are green in color. While brown spots on the skin of limes may not affect their color, limes that are mostly brownish in color should be avoided since this may be an indication that they have "scald" which may cause them to have an undesirable moldy taste.

Storing of limes - Choose limes that are firm and heavy for their size, free of decay and mold. They should have a glossy skin that is deep green in color; although limes turn more yellow as they ripen, they are at the height of their lively, tart flavor when they are green in color. While brown spots on the skin of limes may not affect their color, limes that are mostly brownish in color should be avoided since this may be an indication that they have "scald" which may cause them to have an undesirable moldy taste.

USING
Before cutting the lemon or lime in half horizontally through the center, wash the skin so that any dirt or bacteria residing on the surface will not be transferred to the fruit's interior. While you could remove any visible seeds before juicing the halves, you could also wait until after the process is complete, since there are bound to be some seeds that reside deeper and are not visible from the surface. The juice can then be extracted in a variety of ways. You can either use a juicer, reamer or do it the old fashioned way, squeezing by hand.

Linda T's Butterscotch Pecan Dessert

I went to a church event and this little beauty was beckoning my name. Normally, I am not a fan of butterscotch at all, but I thought I would live dangerously and give it a try! I am so glad I did, because it is definitely blog worthy, aka my taste buds approved!
I believe the original recipe comes from Taste of Home and was submitted by Becky Harrison in Albion, Illinois! But, for my purposes I will always remember this as Linda T's recipe! You will notice in the pictures you will see red sprinkles.  They were added just because she had a wild hair!
Can I make you fall in love with a dessert that doesn't have chocolate??

Butterscotch Pecan Dessert

1/2 cup cold butter
1 cup all purpose flour
3/4 cup chopped pecans divided
1 package (8oz) softened cream cheese
1 cup confectioners sugar
1 carton (8 oz) frozen whipped topping, thawed, divided
3-1/2 cups milk
2 packages (3.4 or 3.5 oz each) instant butterscotch or vanilla pudding!

Preheat oven to 350

Step I.
1. In a bowl, cut the butter into the flour until crumbly.
2. Stir in 1/2 cup pecans. Press into an ungreased 13x9x2 inch baking pan.
3. Bake in pan at 350 degrees for 20 minutes or until lightly browned. Cool.

Step II.
1. In a mixing bowl, beat cream cheese and sugar until fluffy. Fold in 1 cup whipped topping.
2. spread over crust.
3. Combine milk and pudding mix until smooth, in seperate bowl.
4. Pour over cream cheese layer.
5. Refrigerate for 15-20 minutes or until set. Top with remaining whipped topping and pecans.
6. Refrigerate for 1-2 hours and serve!
Yield- 16-20 servings!
Give it a try! It will be so worth your time!

How to Hard Boil a perfect Egg

The basics for this is pretty cut and dry. Here are the steps


  1. PLACE eggs in saucepan large enough to hold them in single layer.
  2. ADD cold water to cover eggs by covering 1 inch.
  3. HEAT over high heat just to boiling point. I always add salt to my water. (At this point if I want to rush the process, I will cook my eggs and check whether the egg is done by removing an egg from the boiling water with a slotted spoon. Your egg is done depending on how quickly the water evaporates off of the egg! It works every time!! If your water evaporates to a dry egg in 10-15 seconds, you have a soft boiled egg!
  4. REMOVE from burner. COVER pan.
  5. LET EGGS STAND in hot water about 15 minutes for large eggs (12 minutes for medium eggs; 18 minutes for extra large).
  6. DRAIN immediately then peel and serve warm. OR,
  7. Cool completely under cold running water or in bowl of ice water, then REFRIGERATE.
At this point you can make egg sandwhiches, egg salad and devils eggs.

    Tuesday, March 1, 2011

    Dan's famous Five Cheese Macaroni and Cheese

    This might as well be called Heart attack mac and cheese because one bite into this
    and your heart skips a beat for just a second. It is also a very rich and heavy
    decadent dish! Eat with caution and beware your waist line will grow!!

    Look at all that bubbly cheese and richness!
    Ingredients:

    1 stick butter
    2 pint container,medium size, heavy cream.
    1/2 Cup of flour
    1 brick of Asiago, shred
    1 brick fontina, shred
    1 bag of Monterey Jack (2 cups)
    1 bag sharp cheddar (4 cups)- divided, save 2 cups for topping
    1/2 cup grated parmesan cheese
    2 lbs elbow macaroni

    - Make rue with butter and flour, add cheese and cream, if mixture gets too gummy just add milk to loosen
    cook until it becomes smooth sauce.  You may need to add milk to achieve desired consistency.
    Cook elbows aldente (about 6 min) drain and rinse with cold water
    mix elbows with sauce, spray casserole dish or dutch oven with cooking spray before putting in mixture, top with leftover cheddar and bake 30 min at 350